Automatic Transmission Fluid Exchanger Working Principle
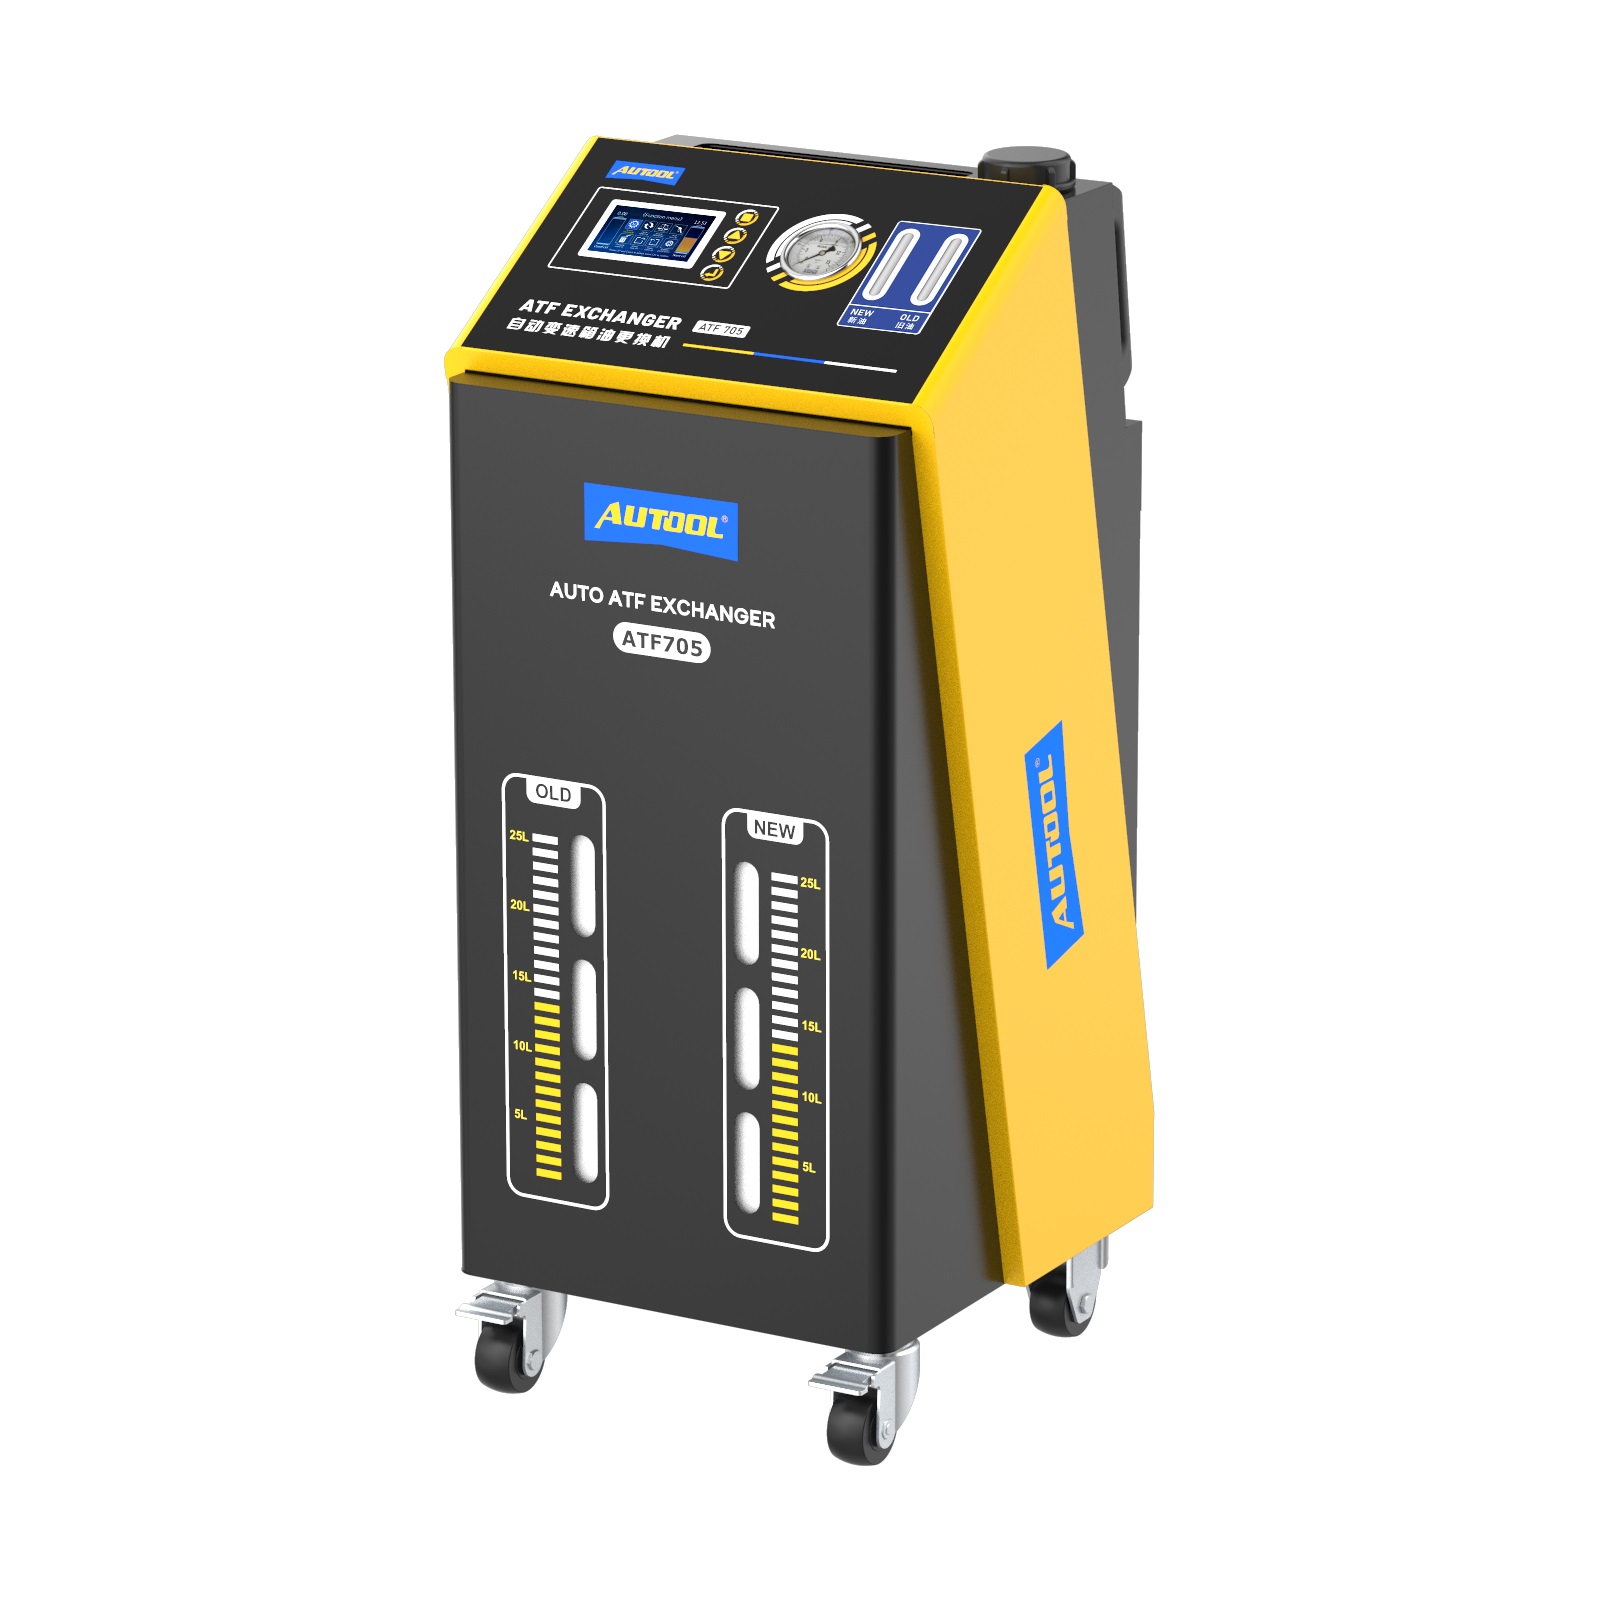
The AUTOOL ATF705 ATF Exchanger features a smart control system for automatic transmission fluid changes. The equipment connects to the transmission oil pipe via specialized connectors, automatically identifying the oil inlet and outlet directions. It activates the built-in pump and sensors to monitor the oil flow rate and exchange ratio in real time. During operation, the used oil is automatically extracted, while new oil is injected in equal volumes with high precision, ensuring a thorough and even oil replacement.
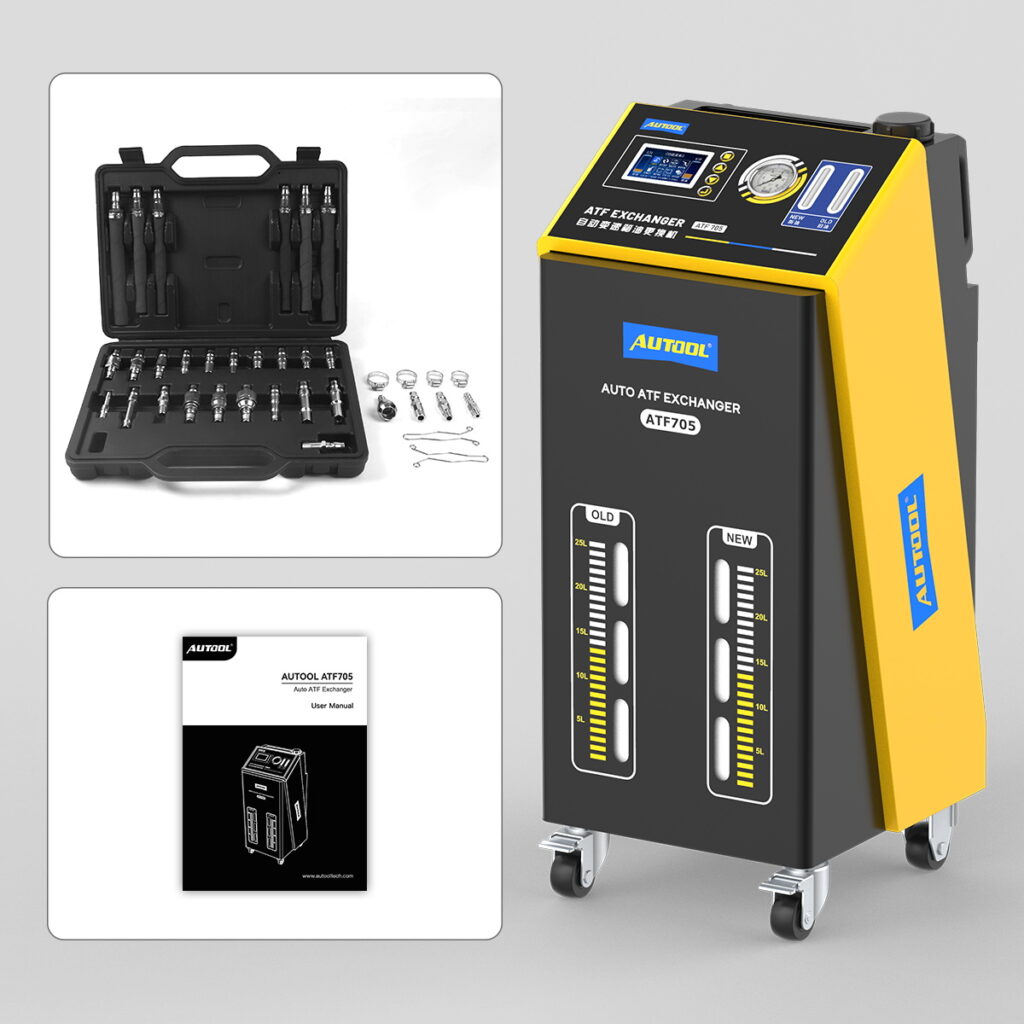
AUTOOL ATF705 ATF Exchanger Features
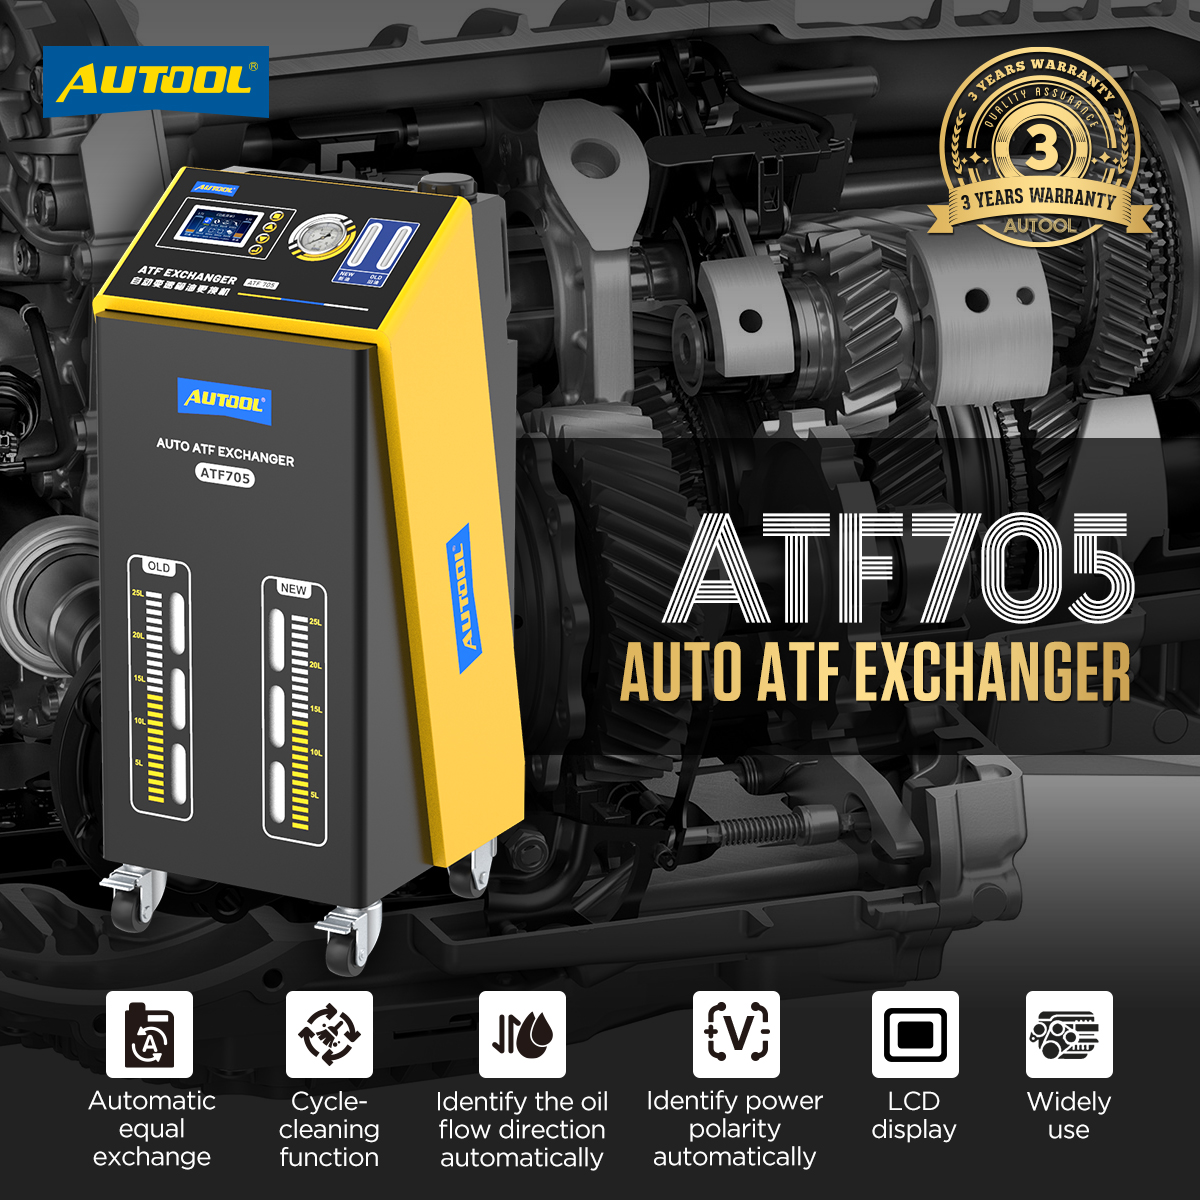
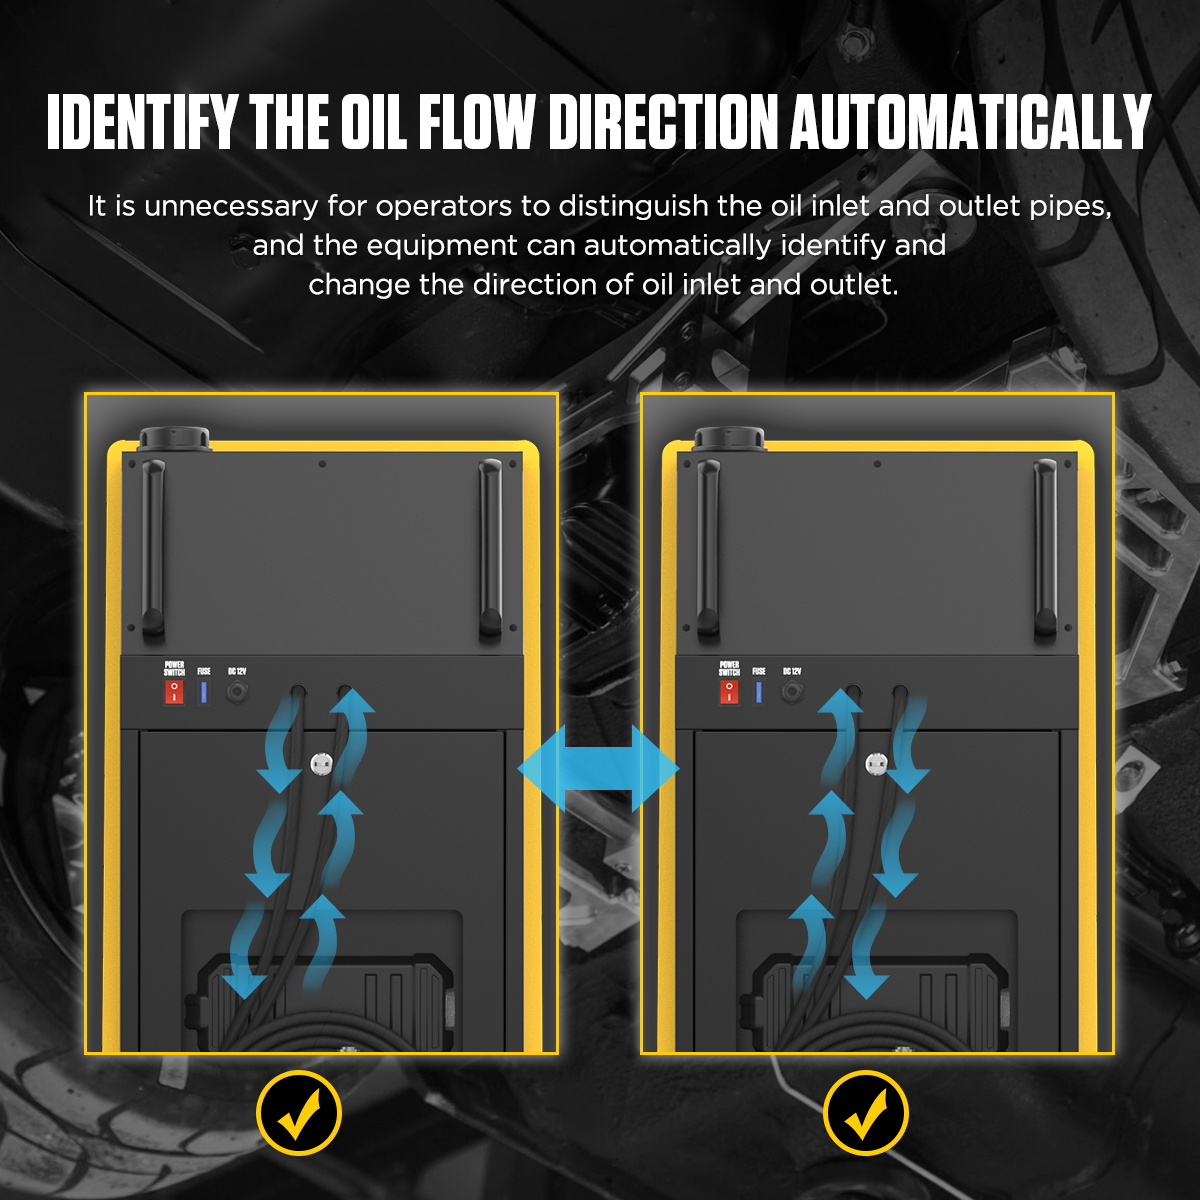
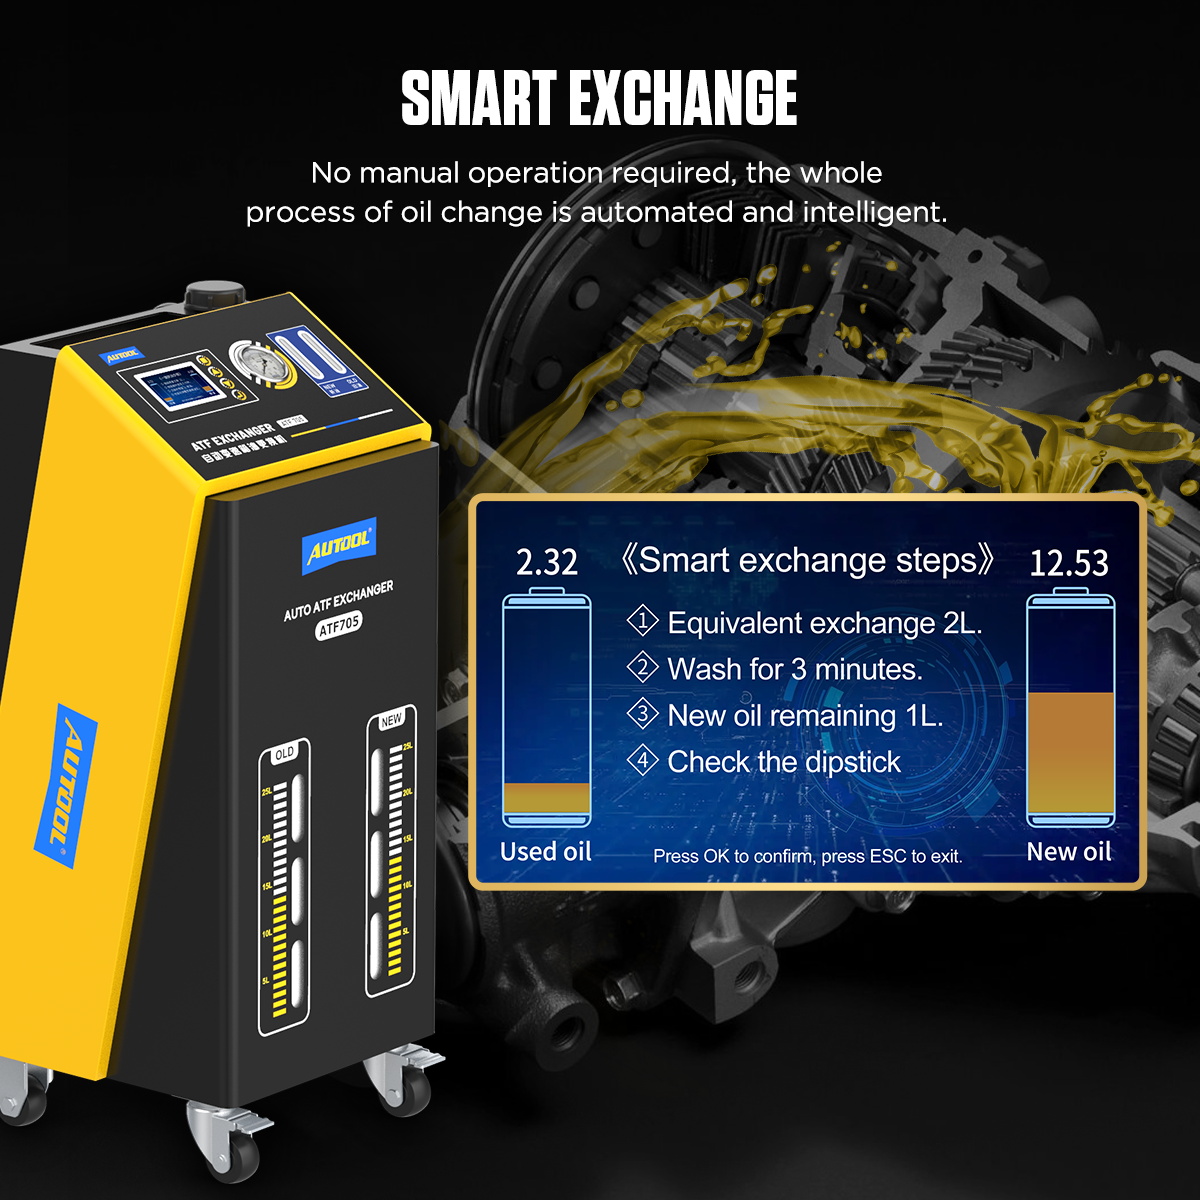
Fully automatic identification and intelligent conversion of oil inlet and outlet directions: There is no need to distinguish between the inlet and outlet pipes. The system automatically detects the oil flow directions with professional accuracy, allowing for operation without manual identification.
Fully automatic replacement of used and new transmission fluid: The system automatically completes the exchange of used and new transmission fluid. Throughout the entire process, the procedure is automated and intelligent, requiring no manual operation, providing you with a completely new experience.
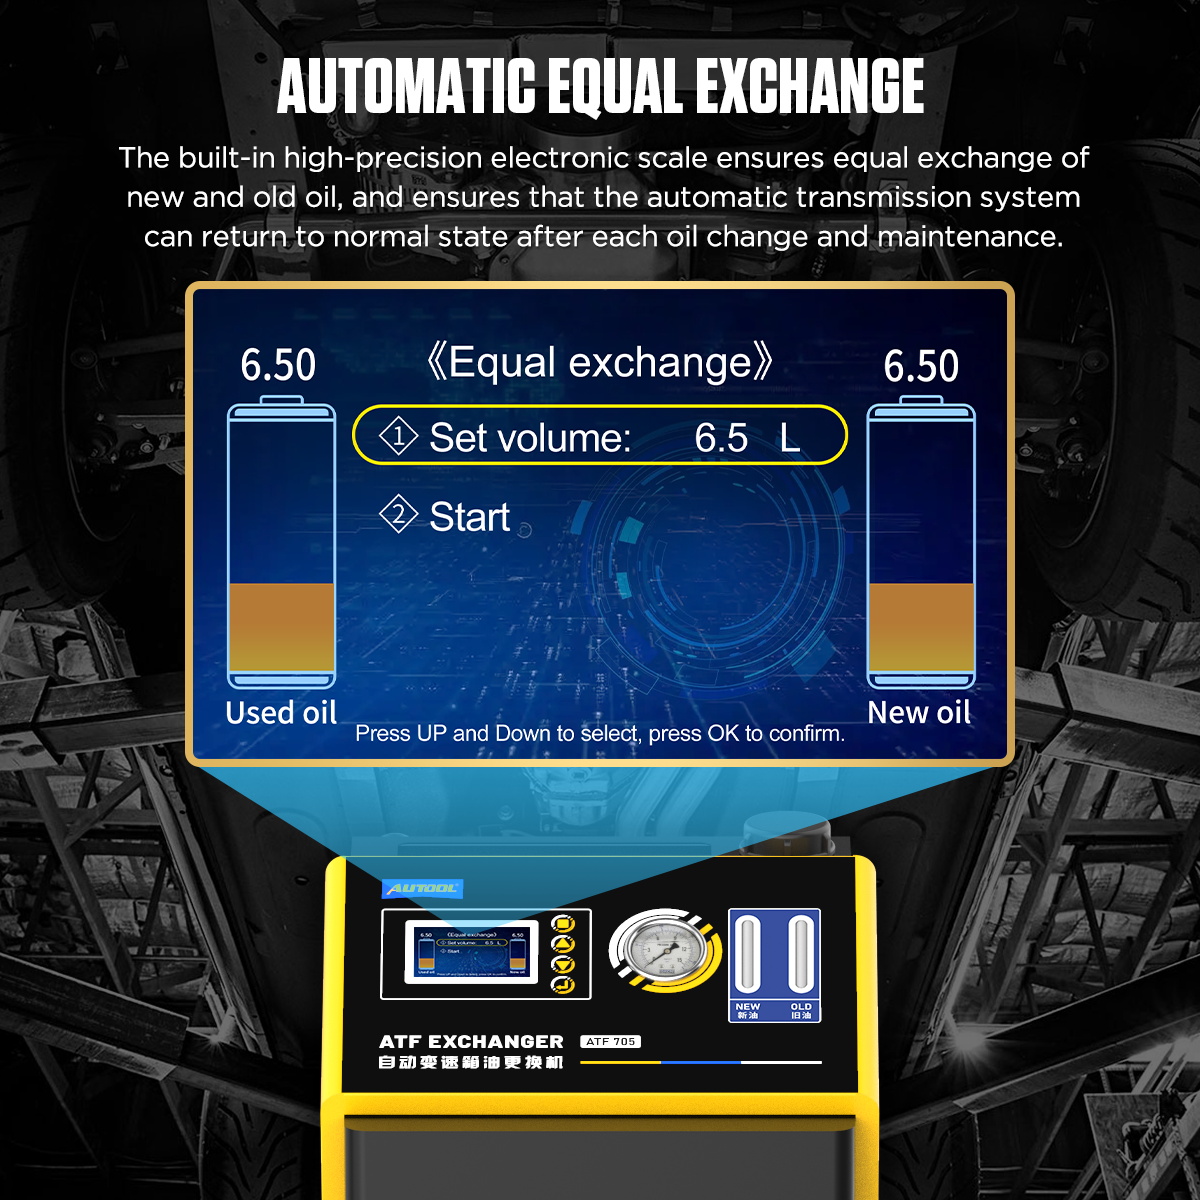
High-precision equal exchange of used and new transmission fluid: The system automatically identifies and balances the oil inlet and outlet flow, achieving a high-precision, equal exchange of used and new fluid.
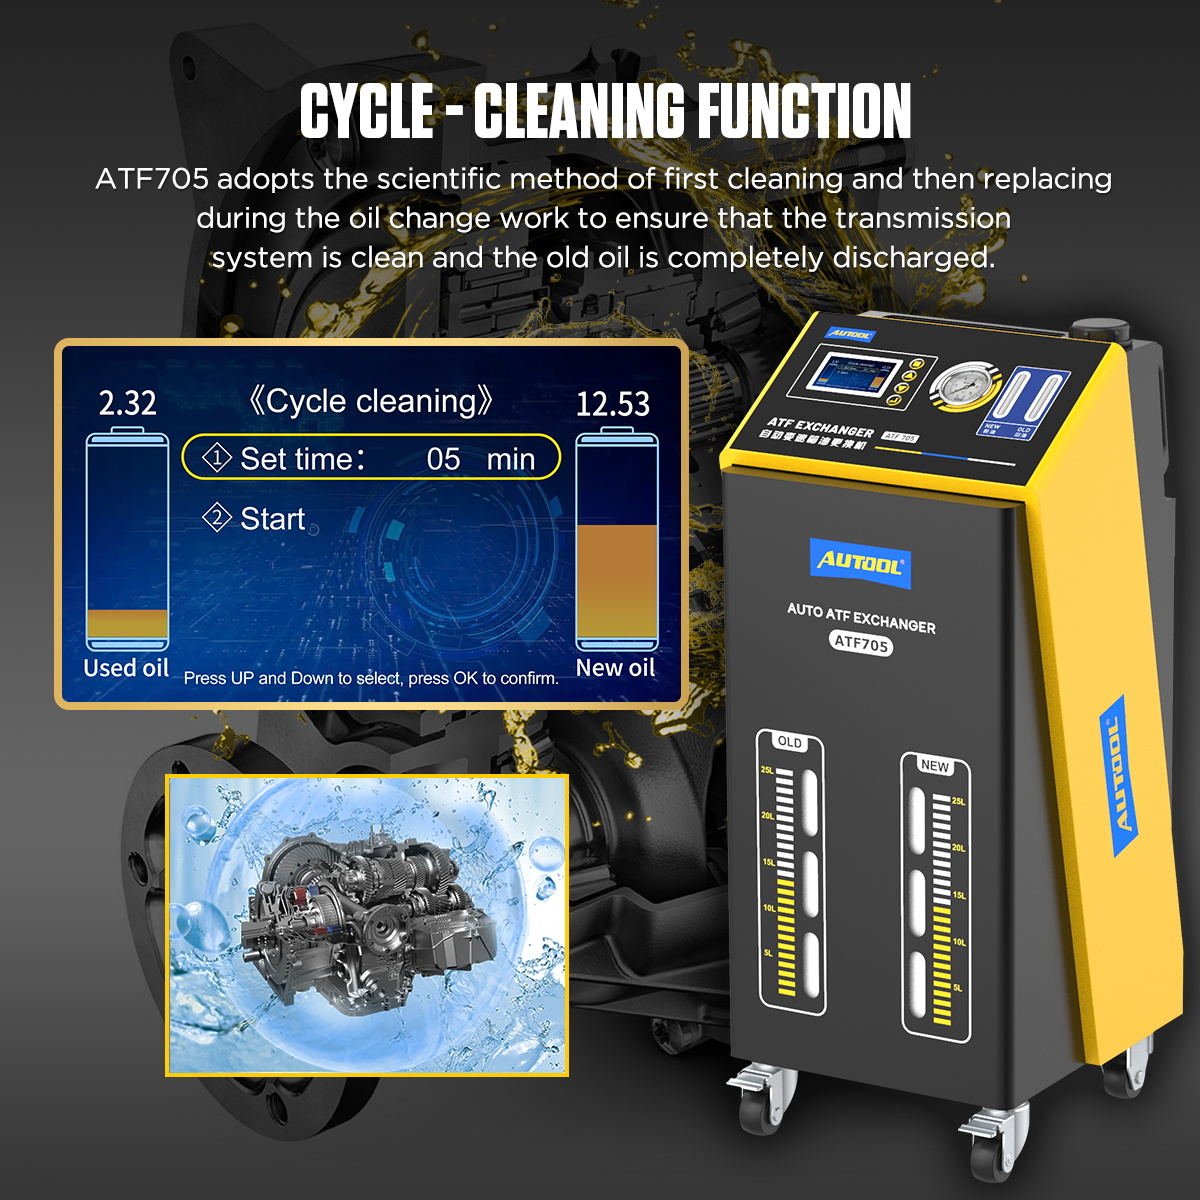
Automatic transmission cyclic cleaning: The automatic cyclic cleaning function effectively removes sludge, improving the thoroughness of the oil change.
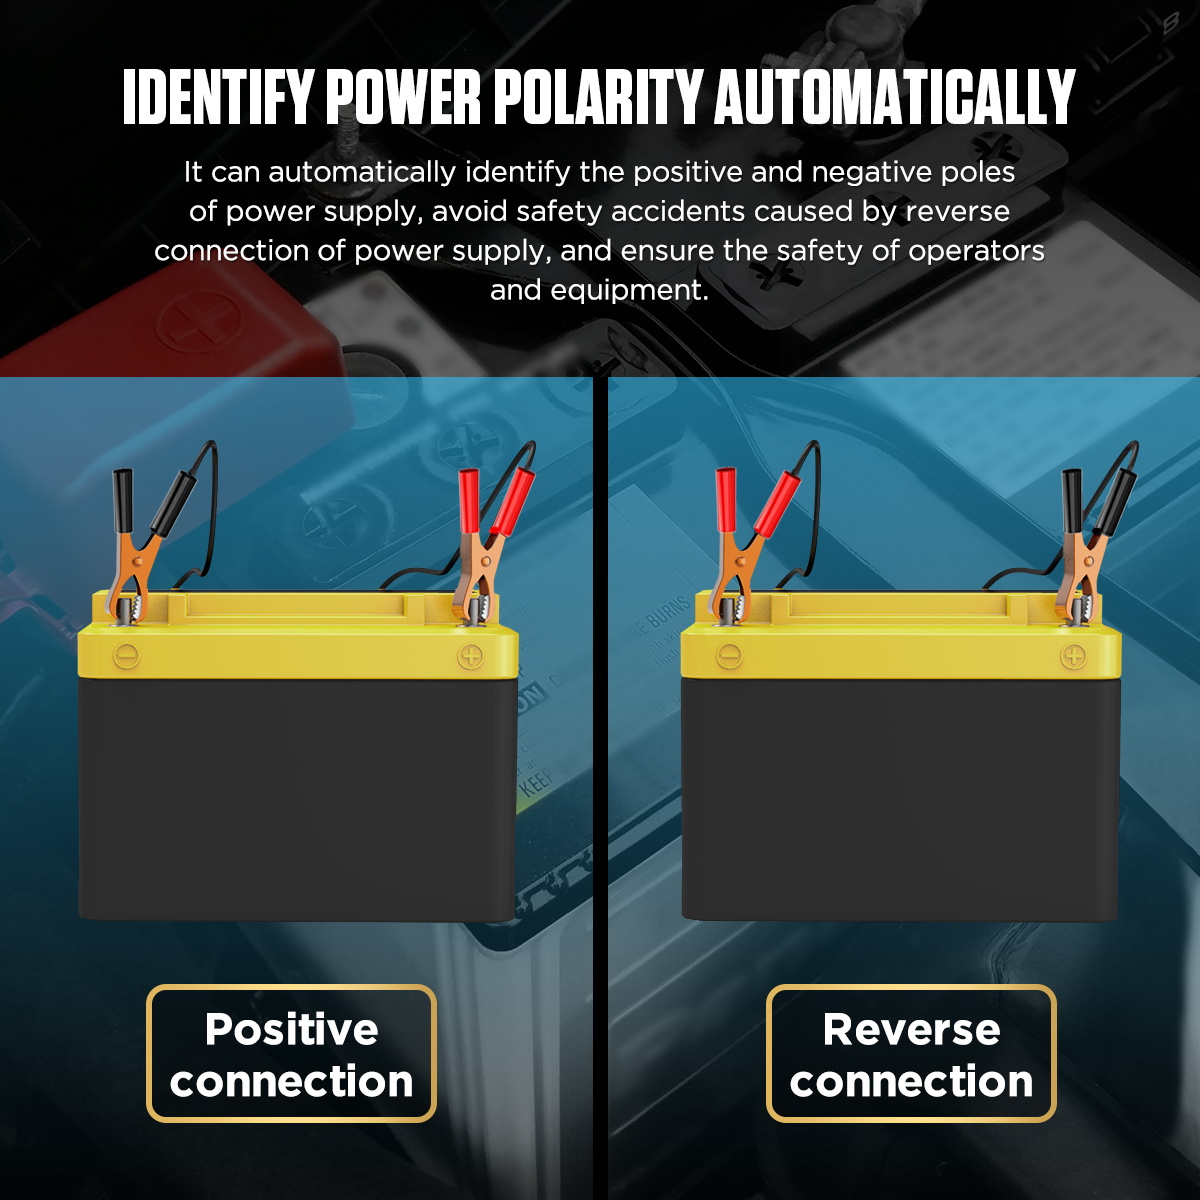
Automatic power polarity recognition: The system automatically identifies the power polarity, preventing accidents caused by manual reverse polarity connections, ensuring safe equipment operation.
No need to disassemble: Connects to the transmission pipelines using quick-connect fittings. No disassembly is needed, and the operation is simple and quick.
Adjustable Electric Pressure Design: Pressure and flow can be adjusted according to the requirements of different vehicle models.
Widely Applicable Models: Equipped with various specialized connectors as standard, suitable for cleaning automatic transmissions of various models produced in Europe, America, and Japan.
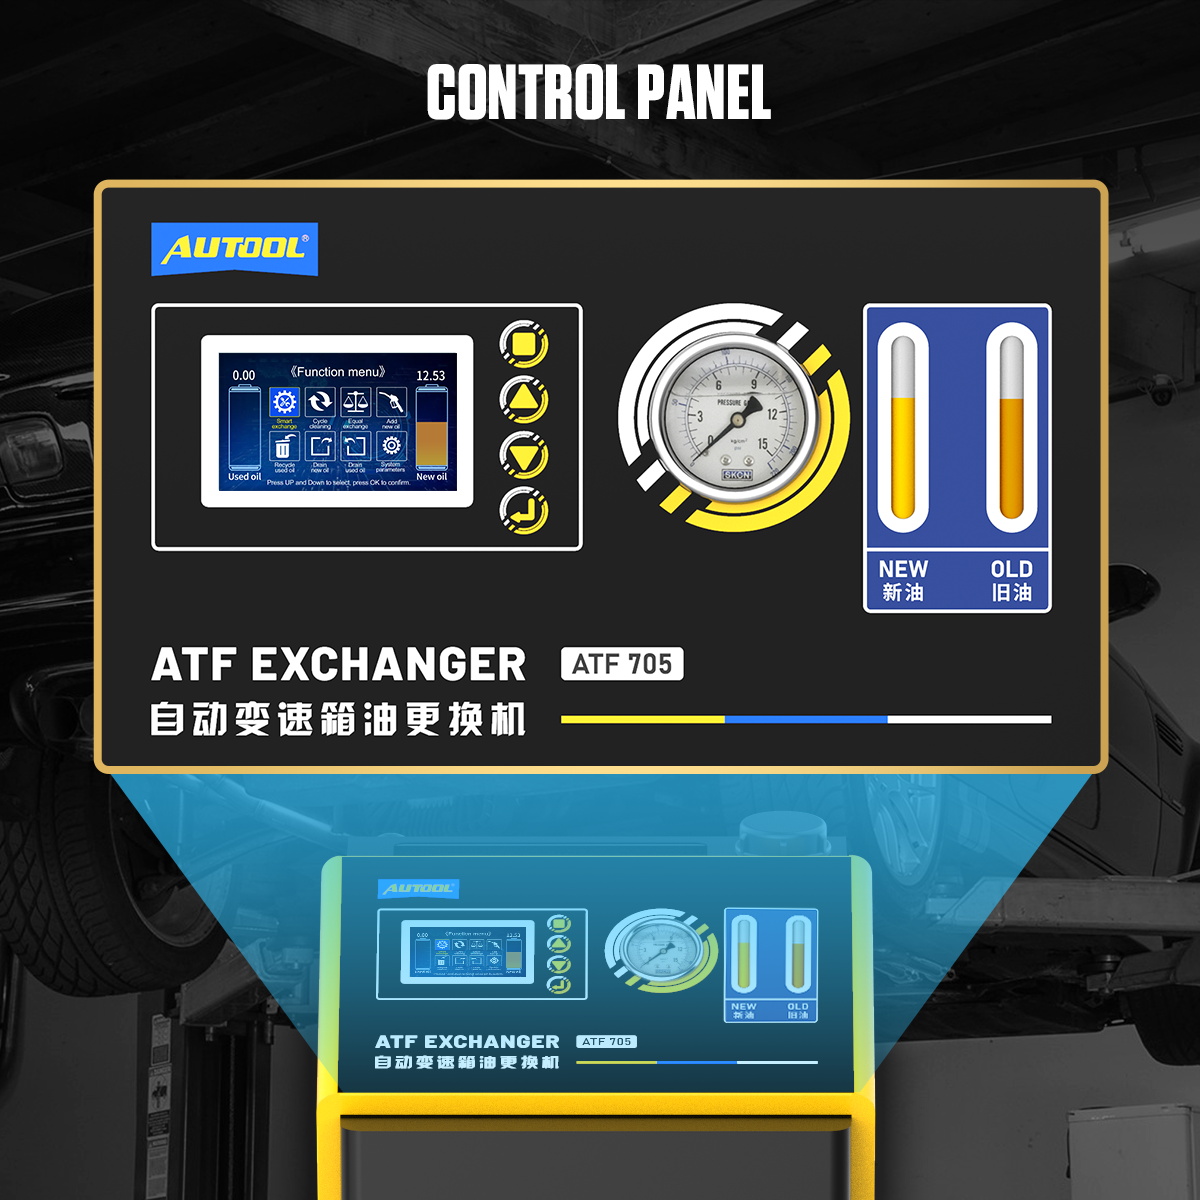
Visual Display: Equipped with new and used oil view windows, providing accurate and professional visualization of oil pressure, oil temperature, and data at a glance.
Portable and Mobile Design: Equipped with swivel casters for easy movement, saving time and effort during use.
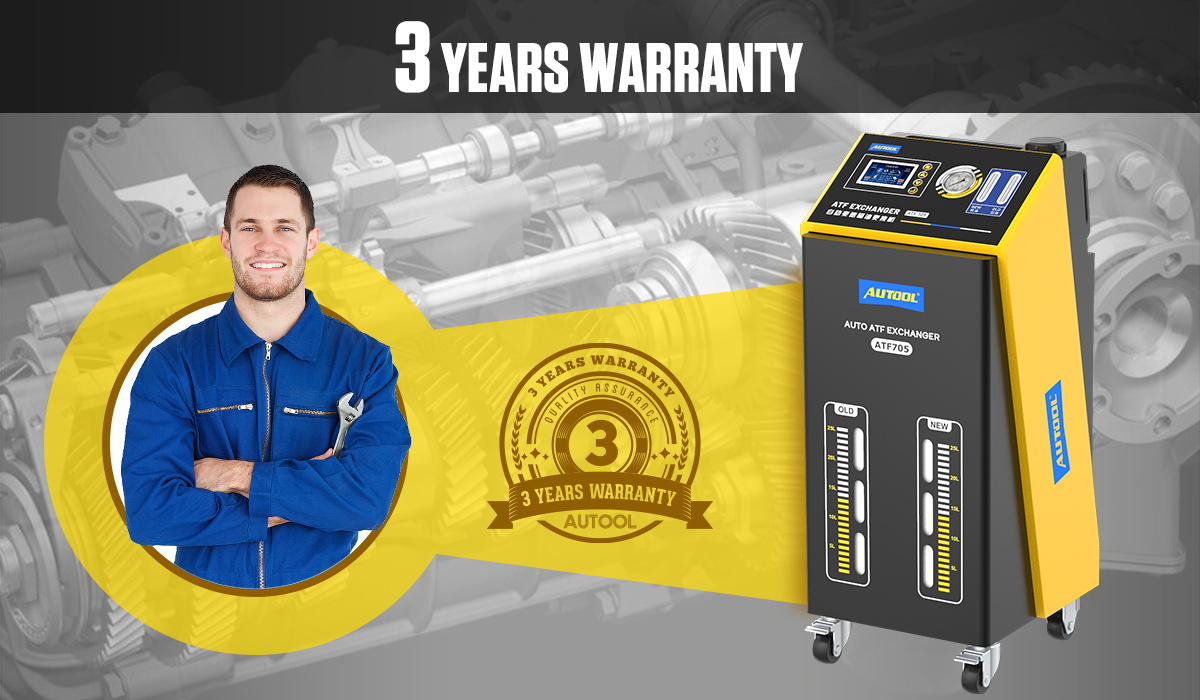
Three-Year Warranty, Lifetime Maintenance: For damage caused by non-human factors, AUTOOL promises to resend parts for free within 3 years. If you have any problems, please contact us, and we will respond within 24 hours!
ATF705 ATF Exchanger Operating Instruction
Preparation
1. Connect the power: Use the power clips to connect to the vehicle’s battery terminals (DC12V; the equipment automatically recognizes the polarity).
2. Lift the vehicle: Raise the vehicle, ensuring that the drive wheels are suspended at least 20 cm off the ground. Engage the handbrake and use wheel chocks for added safety.
3. Connecting pipes: Disassemble the oil pipes of the transmission and radiator, select the appropriate connectors to attach the equipment’s oil pipes, and ensure the connections are secure.
4. Check and confirm: Start the vehicle’s engine and check for any leaks in the pipes. Once confirmed there are no issues, turn on the equipment’s power switch.
Circulating Cleaning Steps:
1. Add cleaning fluid (If cleaning fluid is not added, the flushing can be done via the new oil circulation).
Method 1: Add the cleaning fluid directly into the transmission through the dipstick port.
Method 2: Add the cleaning fluid to the new oil tank of the equipment (at least 1 liter is recommended; if there is less, top up with new oil to make it 1 liter). Select the “Add new oil” function, set the desired volume, and once activated, the cleaning fluid will be automatically injected into the transmission.
Select the “Cycle Cleaning” function and set the cleaning time (recommended for at least 20 minutes). Once started, the equipment will begin a countdown for the cleaning process. You can press the stop button at any time to end the process.
Tips: The engine needs to be kept running during the cleaning process, and different gears should be switched (hold each gear for 1 minute). When operating in high gear, the accelerator should be stepped on to simulate a vehicle speed of over 60 km/h to ensure thorough cleaning of the oil circuit.
Steps for Equal Exchange of Used and New Oil
Preparation
1. Pour the transmission fluid into the new oil inlet of the equipment.
2. Select the “Equal Exchange” function and set the required oil volume (recommended to be 2 liters more than the transmission’s rated oil capacity).
Start Operation
Start the vehicle engine, confirm that the oil pipes are properly connected, and then select “Start Confirmation.” The equipment will automatically perform the equal exchange and display relevant parameters in real-time.
Tips
1. The set oil change volume should not exceed the new oil tank capacity, as the equipment will not operate properly.
2. After cleaning the transmission, ensure the oil change is thorough to minimize the impact of cleaning fluid residue on the seals.
3. During the oil change process, switch between gears (stay in each gear for 1 minute). In high-speed gears, the simulated vehicle speed should reach at least 60 km/h.
4. Do not add oil to the new oil tank during the operation. If oil needs to be added, it should be done after the current function has completed.
Recycling and Draining Steps
Recycling Used Oil:
Select the “Recycle Used Oil” function and set the desired recycling volume.
Start the vehicle engine, and after selecting “Start Confirmation,” the equipment will begin the recycling process, displaying relevant parameters in real-time.
Draining New Oil:
1. Ensure the equipment’s oil pipes are not connected to the vehicle.
2. Select the “Drain New Oil” function. Once started, the oil in the new oil tank will be transferred to the used oil tank.
Draining Used Oil:
1. Open the back door of the equipment, loosen the strap securing the used oil tank, and remove the tank along with the hose.
2. After draining the used oil, place the empty tank back onto the scale platform, reconnect the hose, and secure it with the strap.
Automatic Transmission Fluid Exchanger Maintenance
1. Inspect for Oil Leaks: Check all connections for oil leaks during each oil change.
2. Drain Waste Oil Promptly: After completing the operation, drain the waste oil from the used oil tank and transfer the new oil to a storage container. Ensure that the electronic scale is in an empty state to extend its service life.
3. Maintain Cleanliness: Regularly clean the new oil tank to prevent impurities from contaminating the new oil.
4. Calibrate the Electronic Scale: If the displayed weights of new and used oil appear abnormal, empty the oil tanks and use the system parameters to perform a “one-click zero” calibration. If the issue persists, contact customer service for calibration assistance (refer to the equipment manual for detailed instructions).