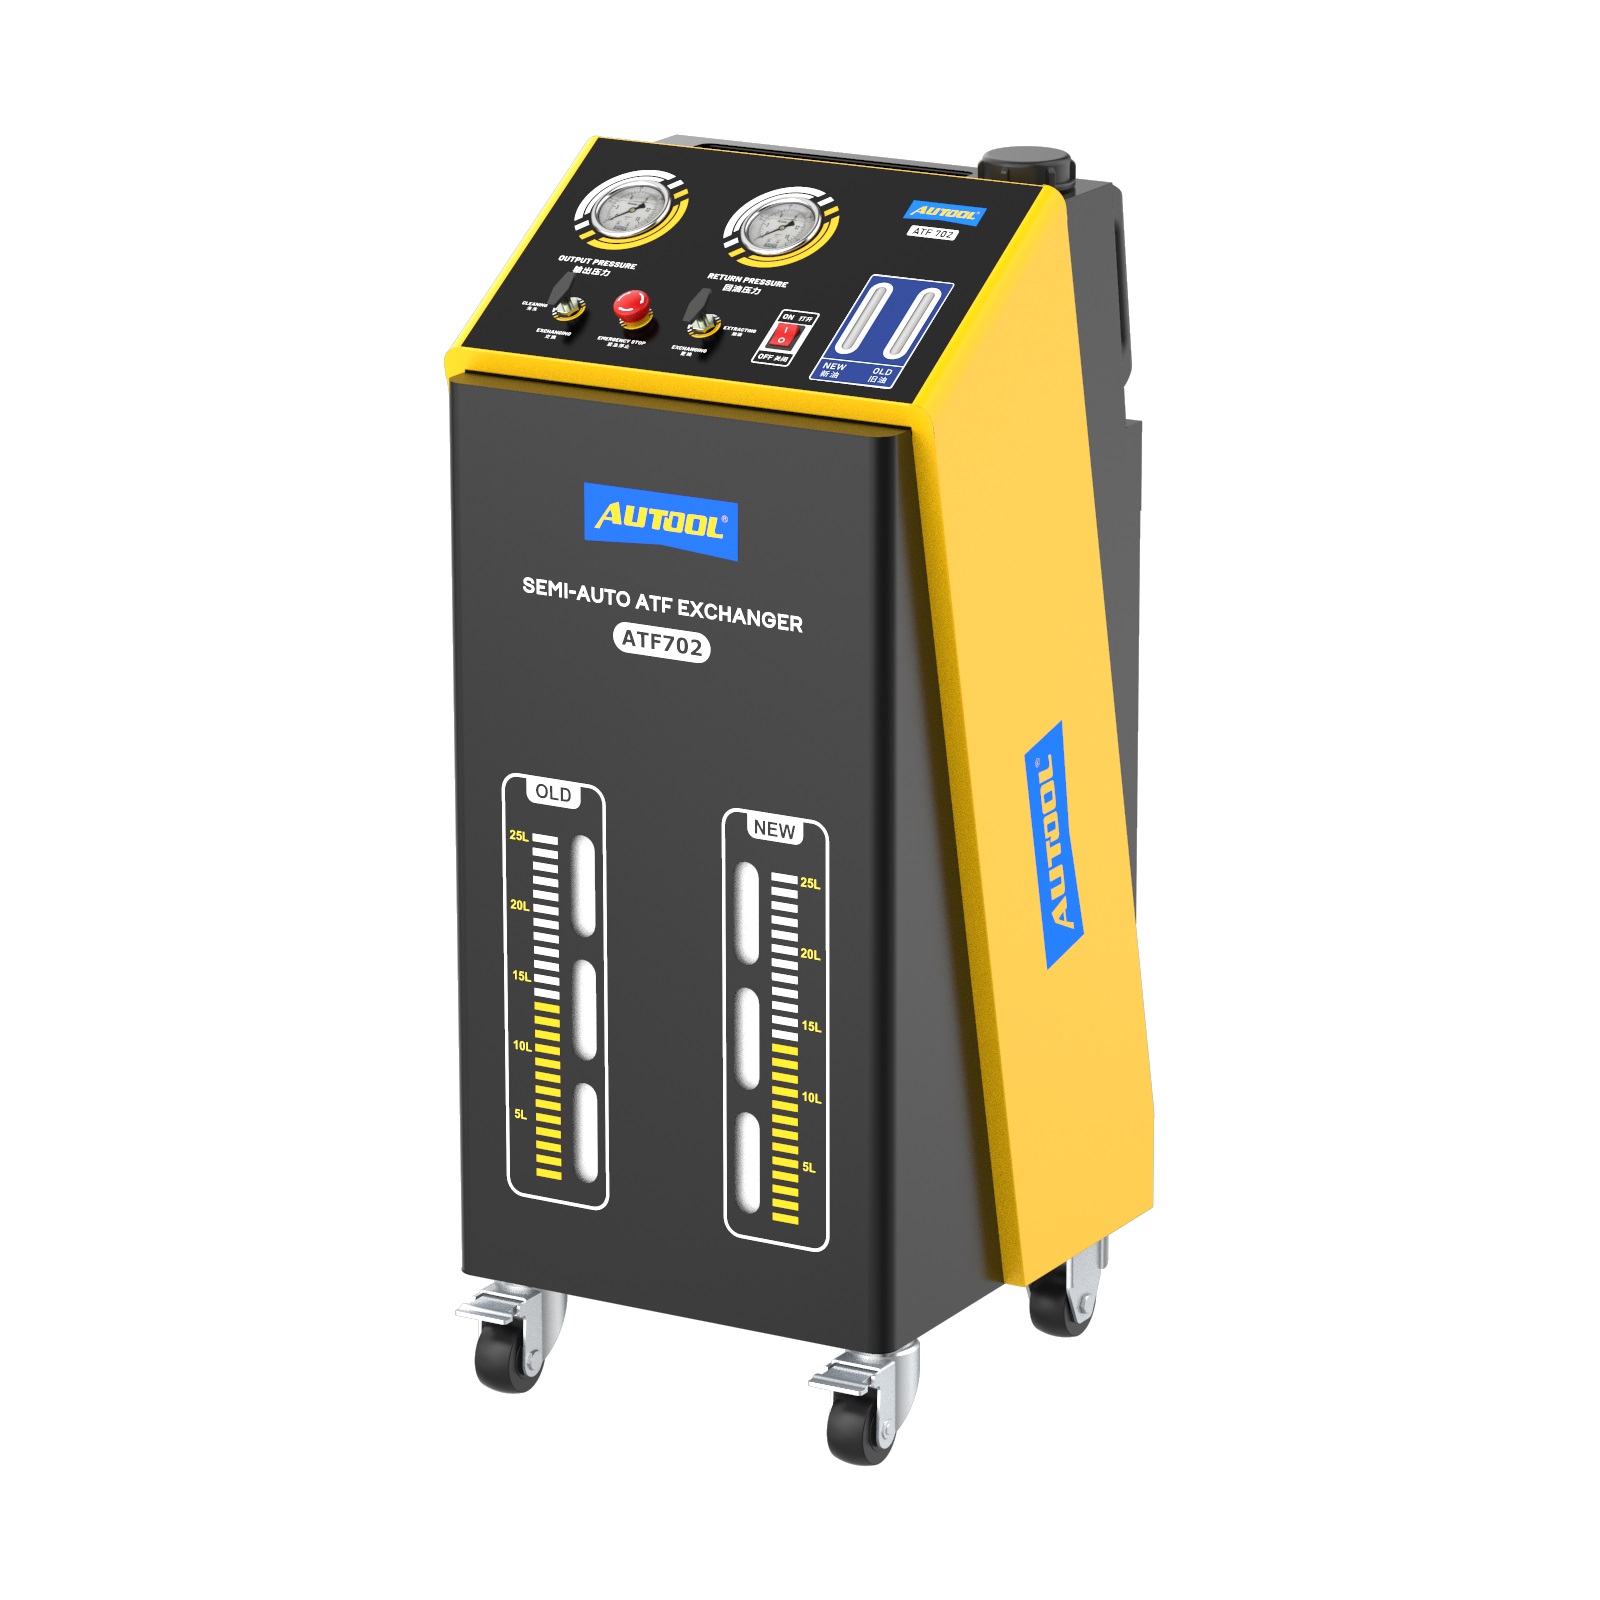
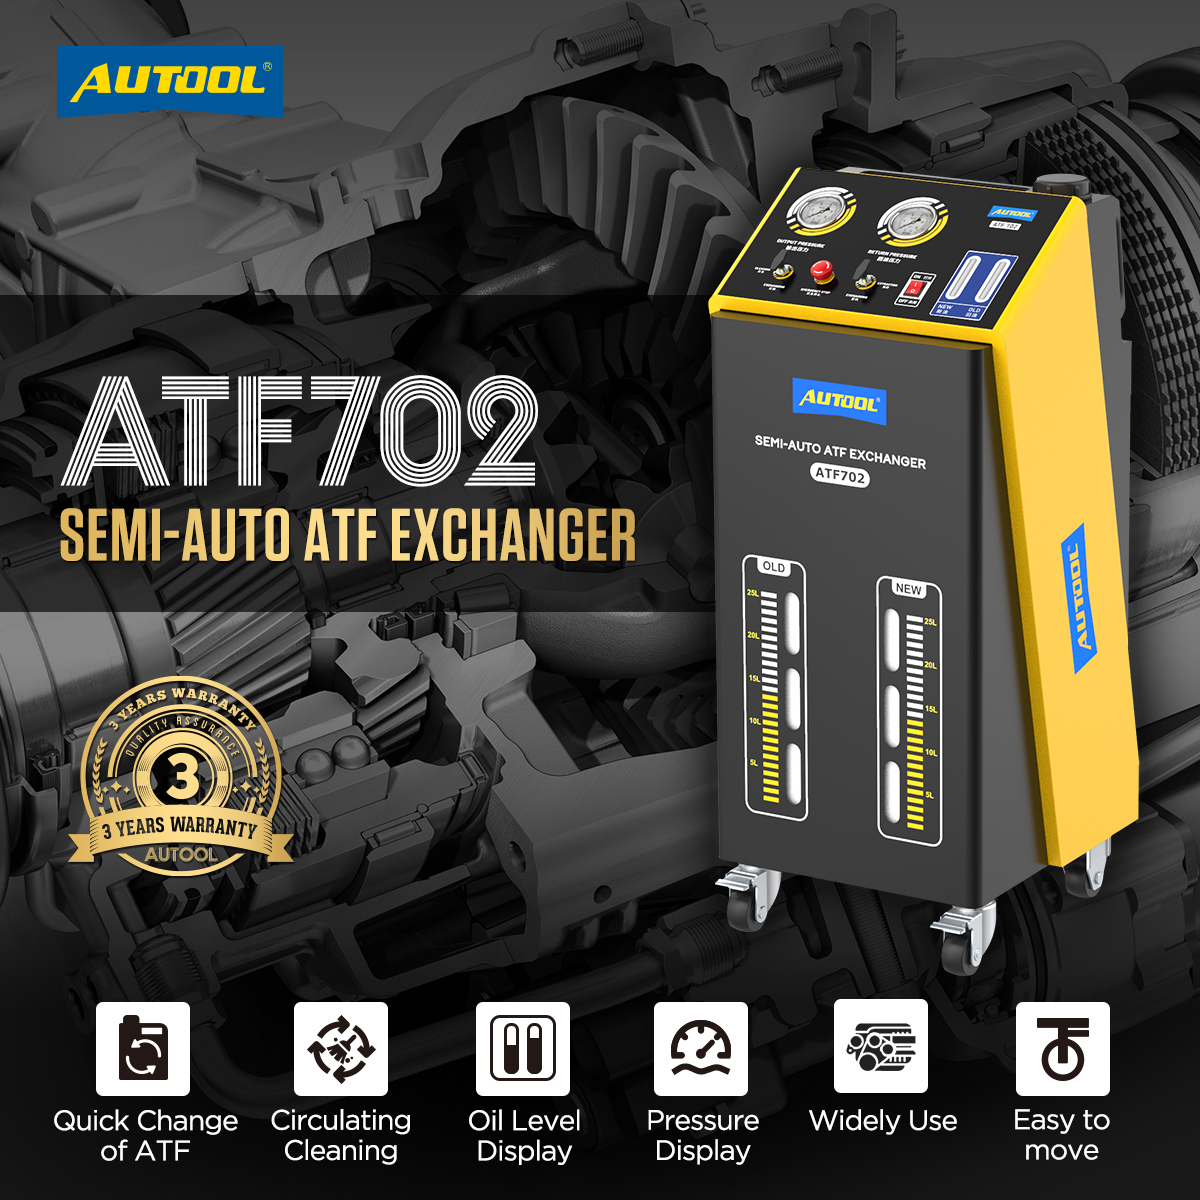
ATF702 Transmission Fluid Exchanger
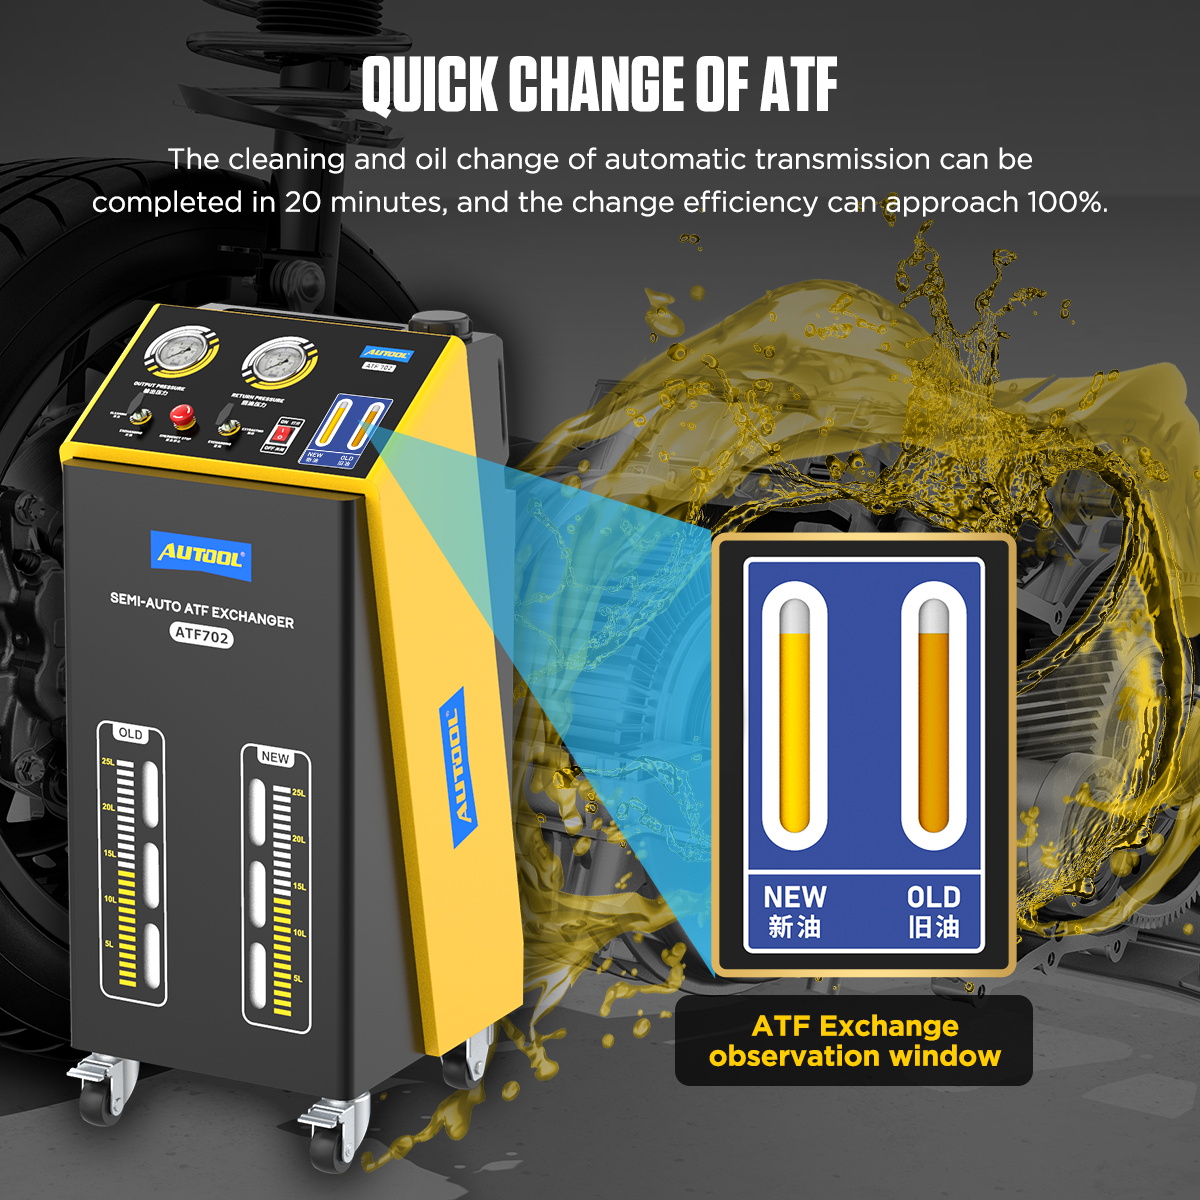
The AUTOOL ATF702 Transmission Fluid Exchanger is an ATF exchanger suitable for all types of automatic transmissions produced in Europe, America, and Japan. It can efficiently complete the cleaning and new oil filling of the transmission, torque converter, and transmission cooler in 20 minutes, with an oil replacement rate of over 90%, effectively avoiding the incompleteness of traditional oil change methods.


Automatic Transmission Fluid Exchanger Working Principle
The AUTOOL ATF702 ATF Exchanger has a smart control system for auto transmission fluid change. During operation, the equipment is connected to the transmission oil pipe via an adapter, automatically extracting the used oil and injecting new oil. The built-in pump and sensors monitor the flow and flow rate of the fluid in real time, ensuring an accurate oil exchange ratio and preventing uneven fluid mixing.
AUTOOL ATF702 Automatic Transmission Fluid Exchanger Features
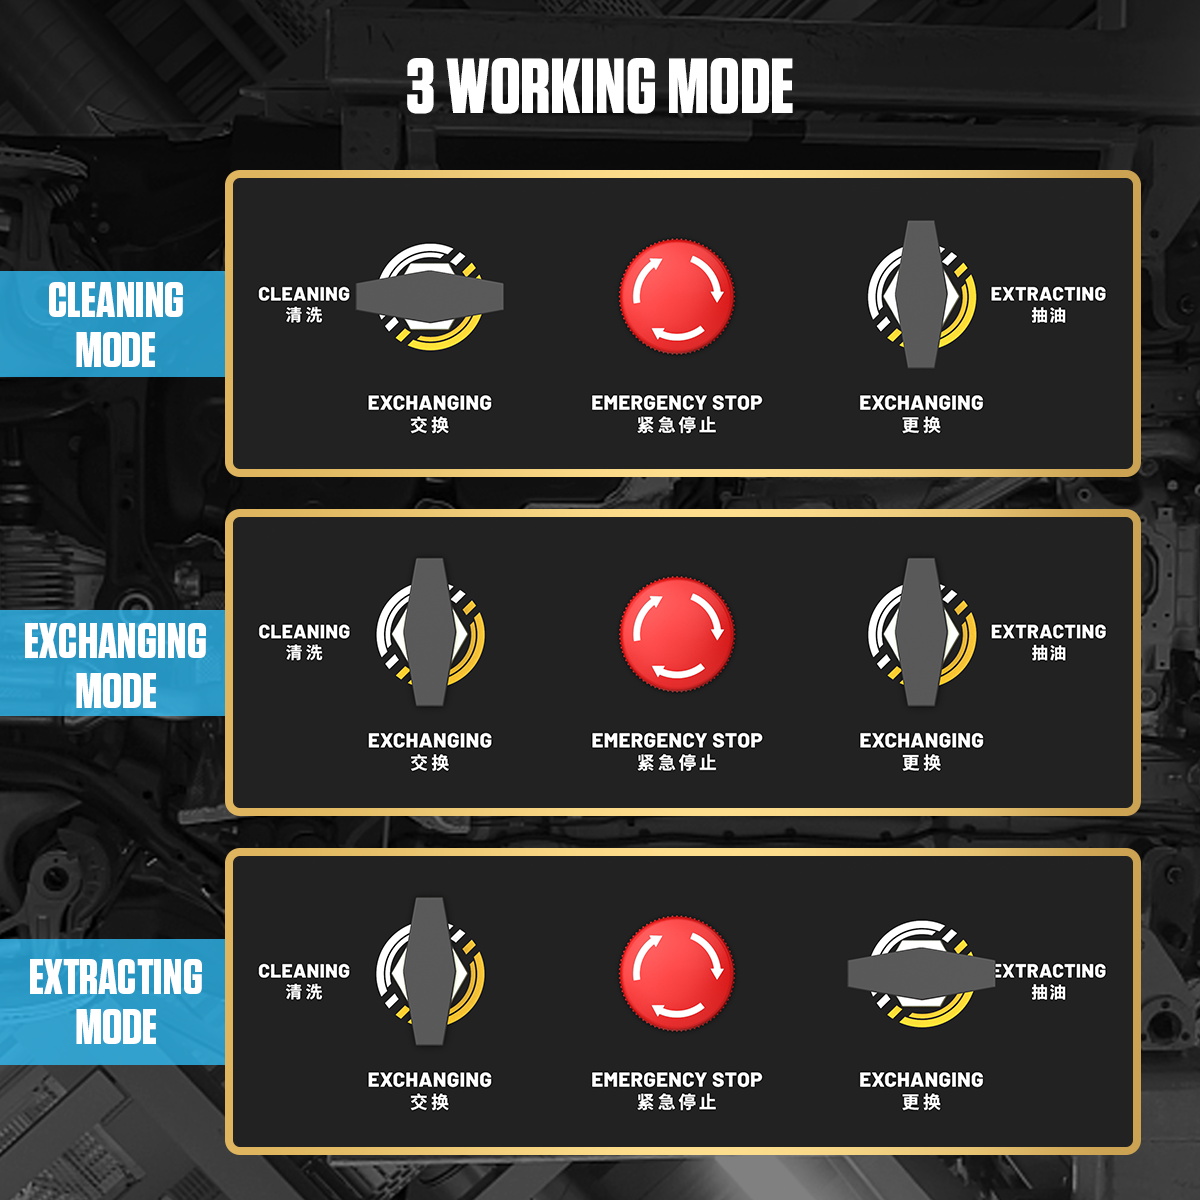
Cleaning Mode: Perform a cleaning before the oil change to remove impurities and metal debris from the oil pipes. It is suitable for cleaning all types of automatic transmissions, ensuring more thorough maintenance.
Oil Change Mode: Quickly change the oil by automatically injecting new oil and draining the used oil. The flow rate is intelligently adjusted, allowing for an oil change rate close to 100%.
Oil Extraction Mode: Automatically extract and drain the waste oil, ensuring thorough removal of used oil and preventing residue.
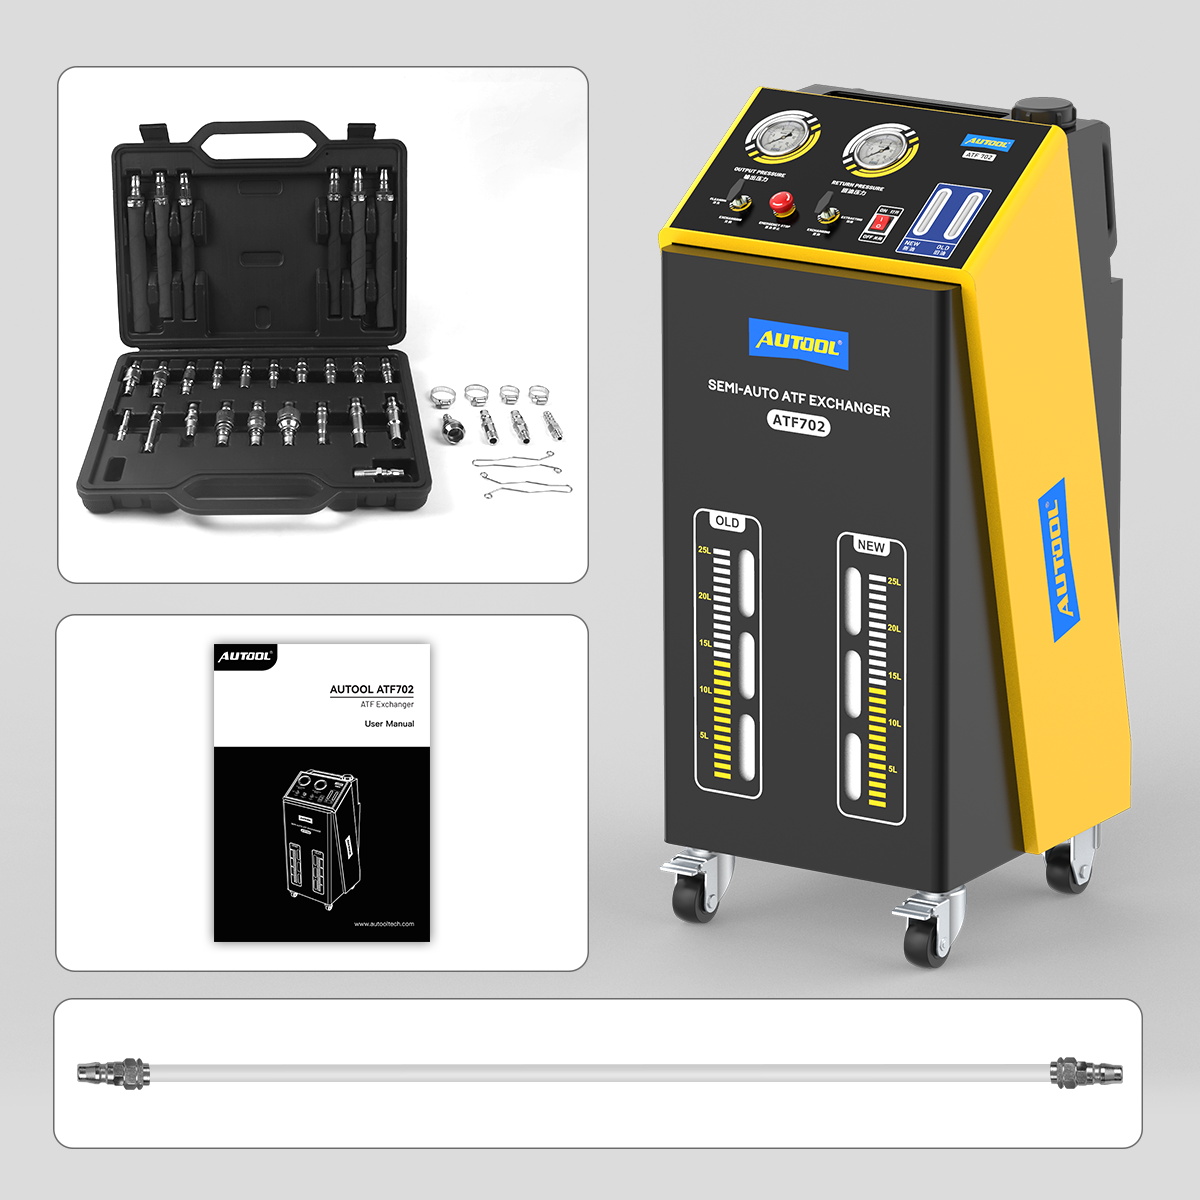
No Disassembly Required: Uses quick-connect fittings to connect to the transmission oil pipe, without the need to disassemble the equipment. The operation is simple and fast.
Adjustable Electric Pressure Design: Pressure and flow can be adjusted according to the requirements of different vehicle models.
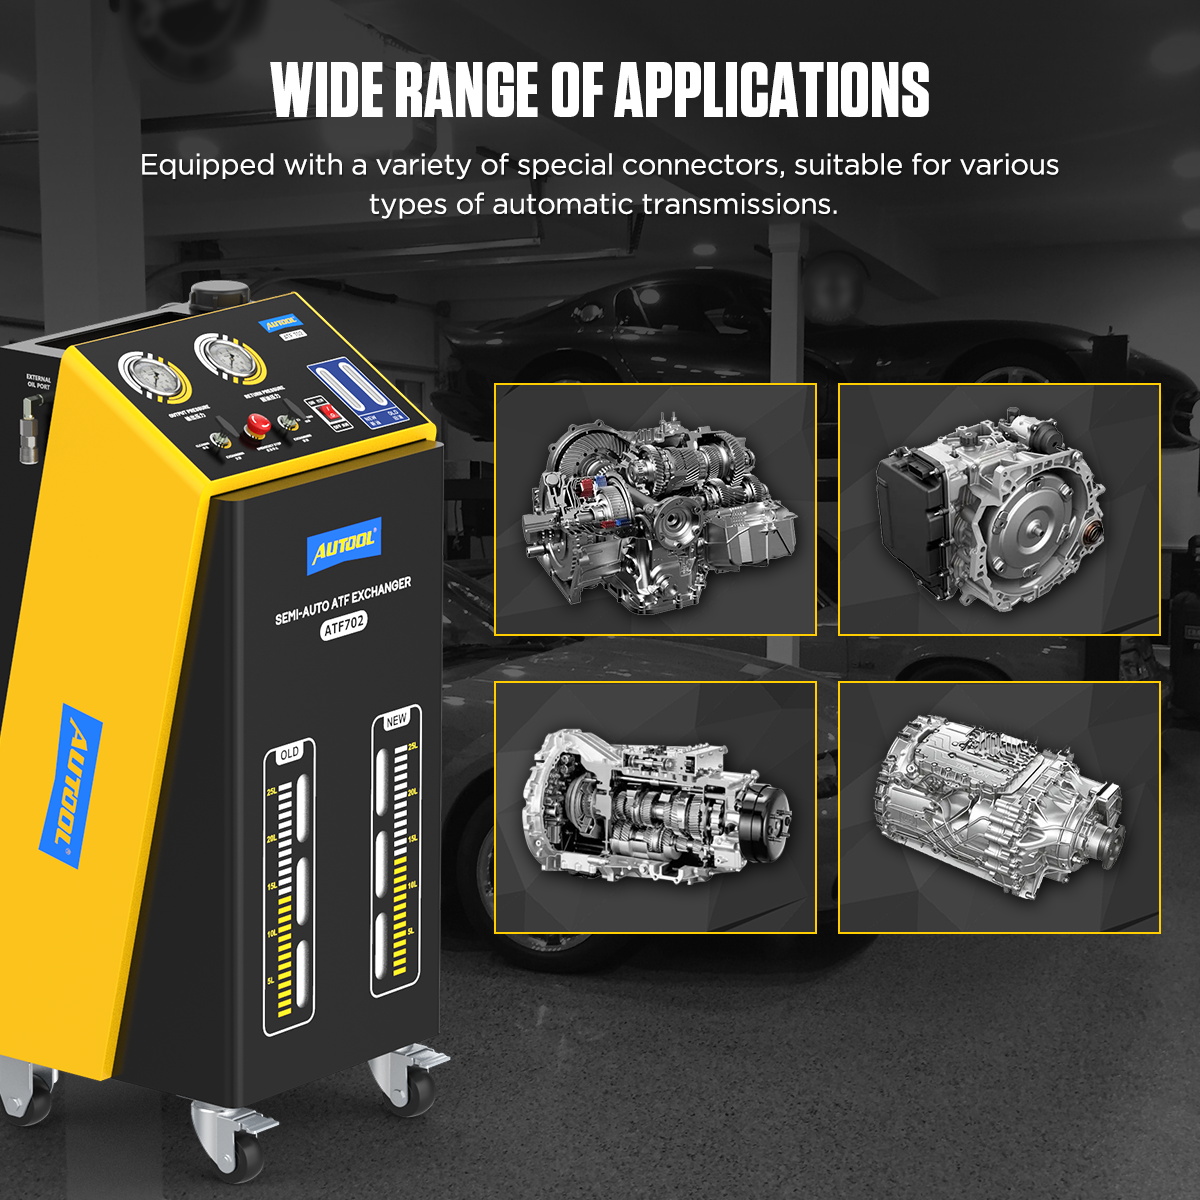
Widely Applicable Models: Equipped with various specialized connectors as standard, suitable for cleaning automatic transmissions of various models produced in Europe, America, and Japan.
Visual Display: Equipped with new and used oil view windows, providing accurate and professional visualization of oil pressure, oil temperature, and data at a glance.
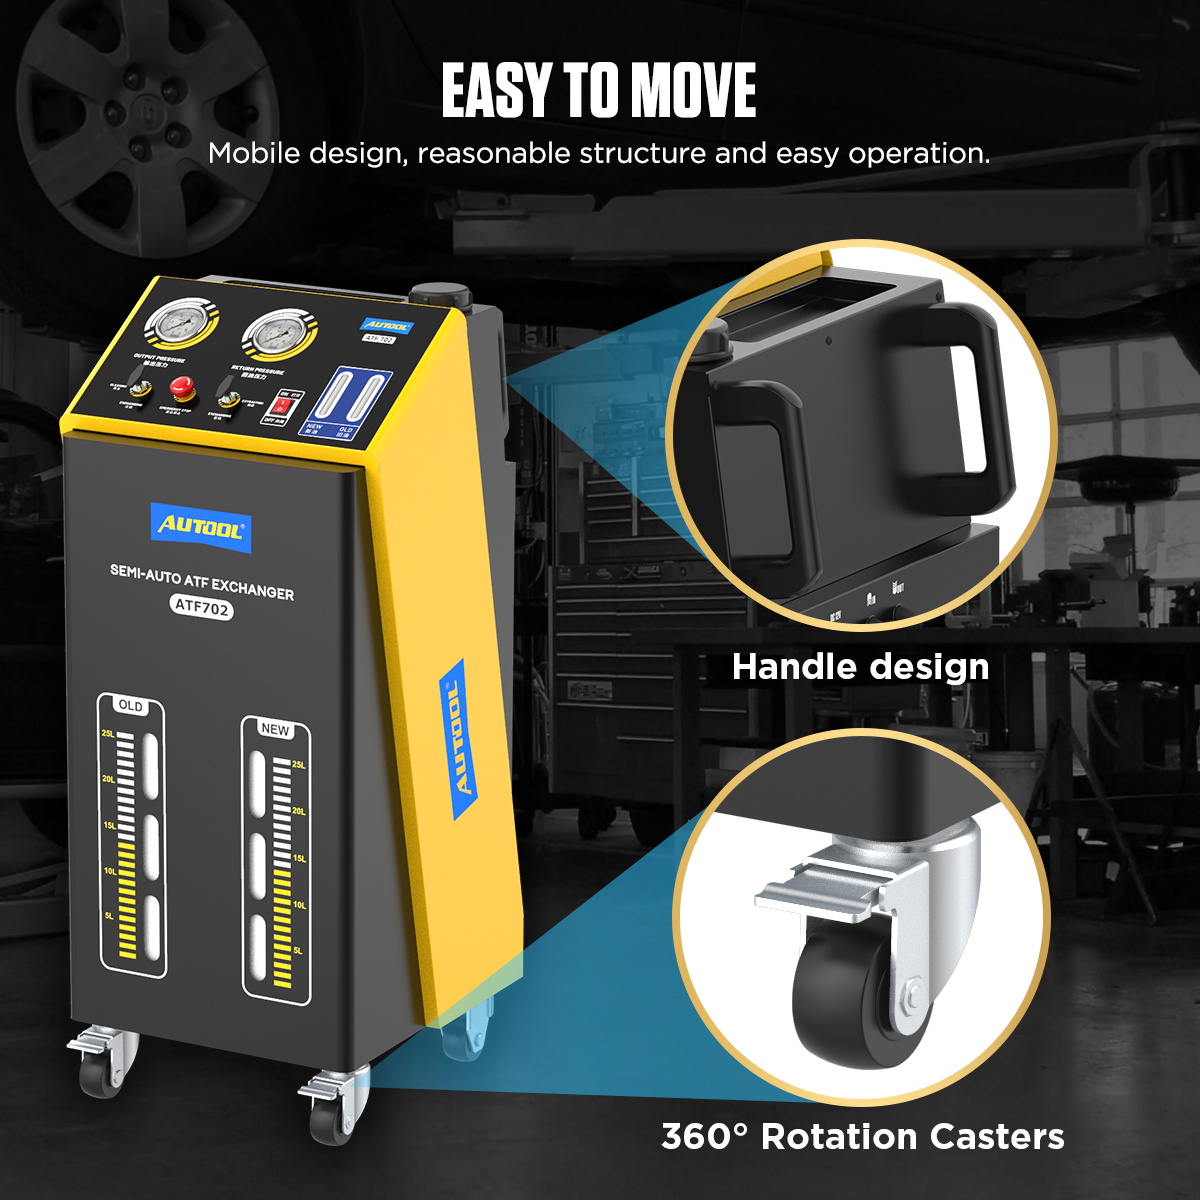
Portable and Mobile Design: Equipped with swivel casters for easy movement, saving time and effort during use.
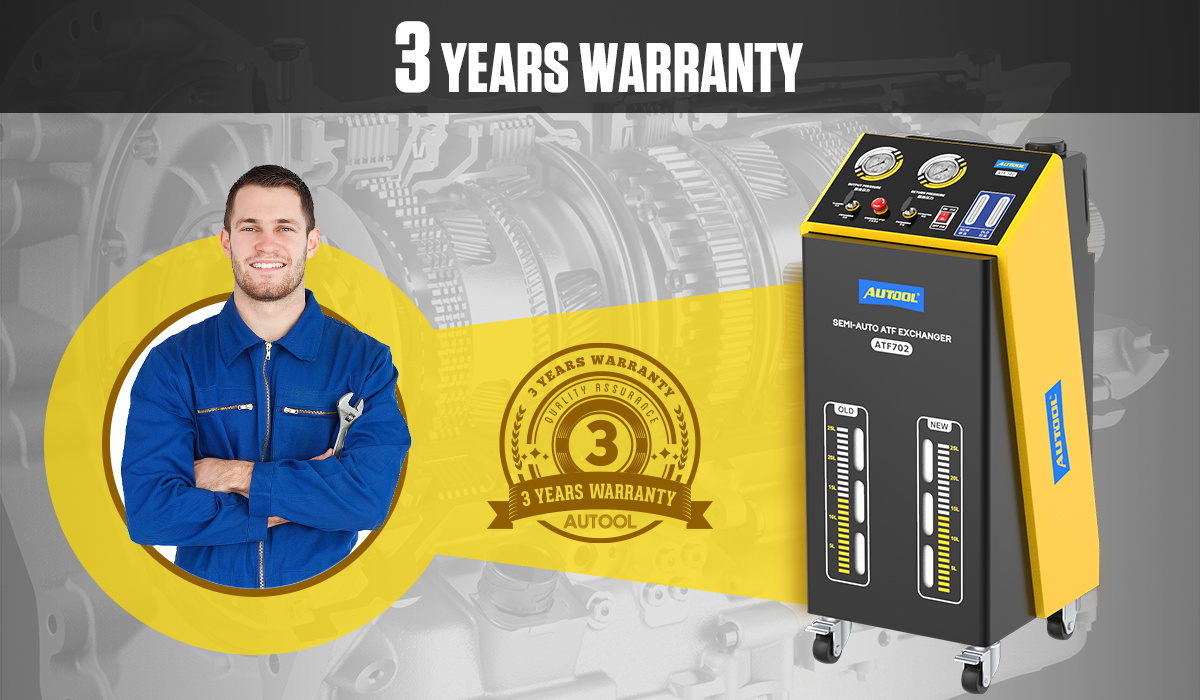
Three-Year Warranty, Lifetime Maintenance: For damage caused by non-human factors, AUTOOL promises to resend parts for free within 3 years. If you have any problems, please contact us, and we will respond within 24 hours!
Operating Instructions
Circulating Cleaning Steps
Preliminary Preparation:
1. Ensure the vehicle is in a braking state and securely lifted.
2. Locate the oil pipe connecting the transmission to the radiator, and select a pipe that is easy to disconnect.
Connect the Oil Pipe:
1. Select the appropriate connector from the adapter box and connect it to the machine’s oil pipe (some vehicle models may require a dedicated connector).
2. Connect the vehicle’s oil outlet to the “Return Oil” connector on the left side of the machine, and the vehicle’s oil inlet to the “Oil Outlet” connector on the right side.
3. Start the engine and briefly check the oil flow direction to ensure correct connections.
Cleaning Operation:
1. Connect one end of the transparent connecting pipe to the external oil inlet on the side of the machine, and insert the other end into the cleaning fluid container.
2. Set the left valve to the “Exchanging” position and the right valve to the “Extracting” position, then turn on the power switch to start injecting cleaning fluid into the transmission.
3. After the cleaning fluid has been fully injected, remove the transparent short pipe and turn off the power switch.
4. Adjust the left valve to the “Cleaning” position and the right valve to the “Exchanging” position.
Circulating Cleaning:
1. Start the vehicle’s engine (the equipment power does not need to be turned on at this time), and the equipment will enter the circulating cleaning mode.
2. Observe the oil flow through the new and used oil view windows. During the cleaning process, hold each gear position for 5-10 seconds. The cleaning is complete after 5 minutes of continuous operation.
3. After the cleaning is complete, the engine can be turned off.
Auto Transmission Fluid Change Steps
Start Oil Replacement:
1. Turn the left valve to the “Exchanging” position and the right valve to the “Exchanging” position, then turn on the equipment power switch.
2. At this point, the equipment begins injecting new oil into the transmission. Once the new oil view window shows the oil flow, start the vehicle’s engine, and the automatic transmission will begin the oil replacement process.
Monitor the Oil Replacement Process:
1. Turn the left valve to the “Exchanging” position and the right valve to the “Exchanging” position, then turn on the equipment power switch.
2. During the oil replacement process, observe both the new and used oil view windows. If the flow of new oil is slow, reduce the flow of used oil by adjusting the valve on the return oil pipe to balance the flow rate of the new and used oils.
3. Hold each gear position for 5-10 seconds to ensure complete oil exchange.
4. Carefully monitor the used oil view window until the color of the used oil matches that of the new oil, indicating that the oil replacement is complete.
End of Oil Replacement:
1. Turn off the engine and reconnect the transmission oil pipe.
2. Restart the engine, switch to the “P” gear, and check the transmission oil level.
3. If the oil level is insufficient, add new oil and check for any leaks in the pipes. Once the oil level is sufficient, perform a test drive (approximately 1 kilometer) and check the oil level again.
Drain the Waste Oil:
1. Set the left valve to the “Exchanging” position and the right valve to the “Extracting” position.
2. Connect one end of the transparent connecting pipe to the “External Oil Suction Connector” and the other end to the return oil pipe, ensuring the connections are correct.
3. Turn on the power switch to begin draining the waste oil until it is completely emptied.
Check and Confirm:
1. Ensure all connections are leak-free. If any leaks are found, stop the machine and reinstall the components.
Waste Oil Drain Steps
1. Turn the left valve to the “Exchanging” position and the right valve to the “Extracting” position.
2. Connect one end of the transparent connecting pipe to the “External Oil Suction Connector” on the side of the main unit and the other end to the return oil pipe.
3. Install an adapter connector at the front end of the oil outlet pipe.
4. Turn on the power switch to begin draining the waste oil.
| ATF702 | |
| Power Supply | DC 12V |
| Maximum power | <150W |
| Pressure gauge | 10kg/cm² |
| Oil outlet pipe | 2.5m |
| Oil return pipe | 2.5m |
| Fuel tank volume | 20L |
| Working Temp. | -10°C ~ +40°C |
| Noise | <70dB |
| Product size | 470 x 440 x 1060mm |
| Relative humidity | <85% |
-
AUTOOL-ATF702-Manual.pdfDownload
